EC312 CAN-to-AWS Configuration Manual
1. Document Information
- Product model: InHand EC312 Edge Computing Gateway
- Plug-in used: Device Supervisor (DSA)
- Cloud: AWS IoT Core
- Reference case: Differential-pressure (DP) sensor on CAN ID
0x18FF0155→ AWS IoT - Date: 2026-05-21
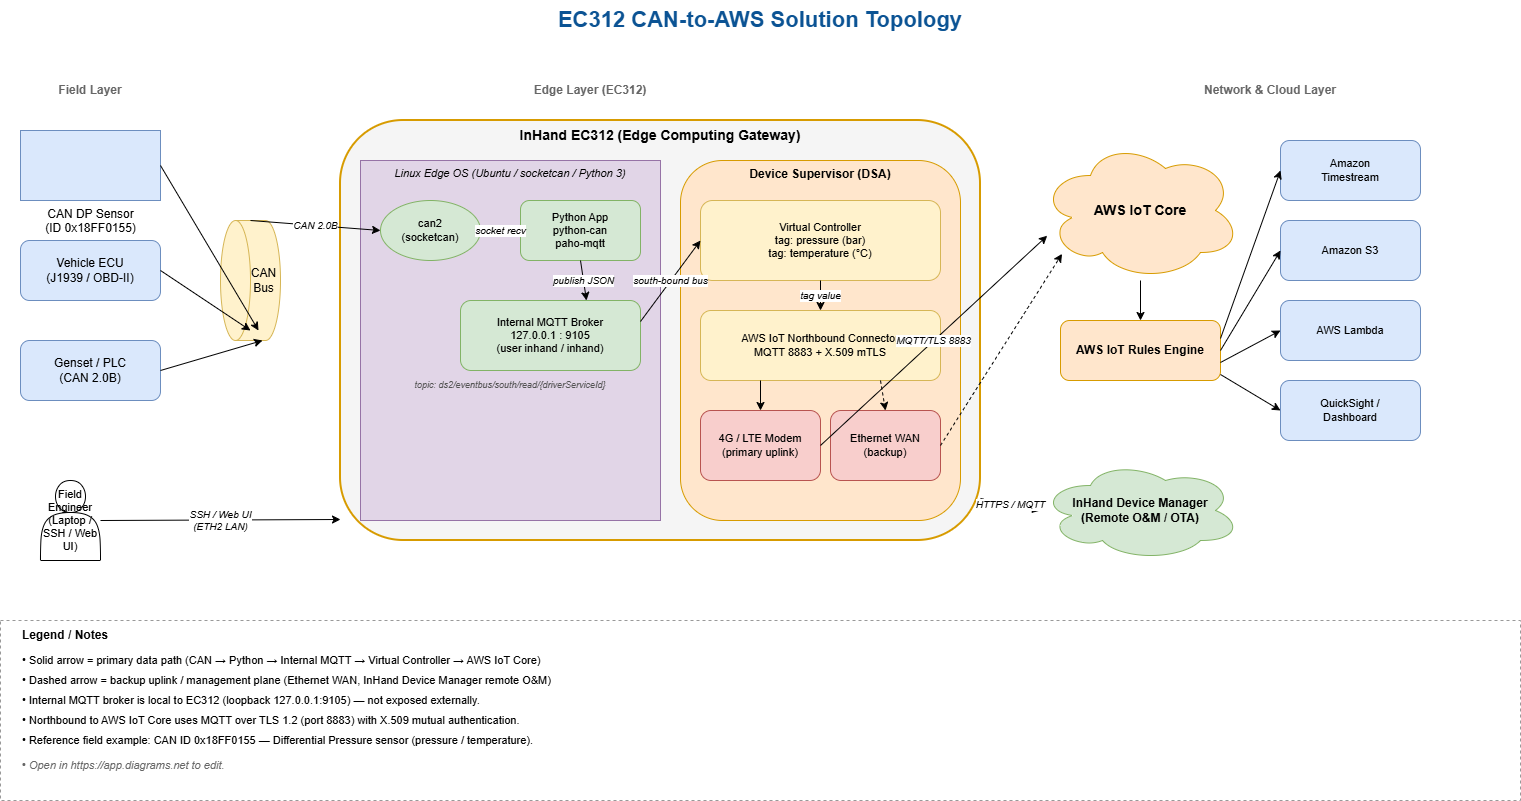
The overall data flow: The Python app receives the CAN data and publishes it to the internal MQTT broker, which then writes the data to the virtual controller. Next, log in to the EC312 Web UI, configure the virtual controller and the cloud connector under Device Supervisor (DSA), to publish the data to AWS.
2. Prerequisites
- EC312 powered on (DC 9–36 V) and reachable on its LAN port.
- A laptop connected to EC312 ETH2 (LAN) and configured to the same subnet (default LAN
192.168.4.0/24). - SIM card inserted (insert with the device powered OFF).
- AWS account ready, with permission to create a Thing, Policy and download X.509 certificates in AWS IoT Core.
- SSH client (e.g. MobaXterm, PuTTY, or
sshon macOS/Linux). - A web browser for the EC312 Web UI.
Default credentials (factory):
| Item | Value |
|---|---|
| LAN IP | 192.168.2.1 (router) / 192.168.4.100 (edge OS) |
| Web username | adm |
| Web password | 123456 (or random — see device label) |
| SSH user | edge |
| SSH password | security@edge |
Change all default passwords after first login.
3. Part 1 — CAN-bus Reader (Python on EC312 edge OS)
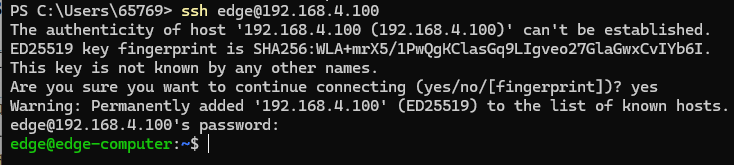
3.1 Connect with SSH
Connect the PC to EC312 ETH2 and SSH into the edge OS:
|
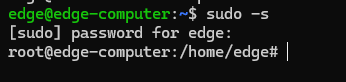
3.2 Switch to root
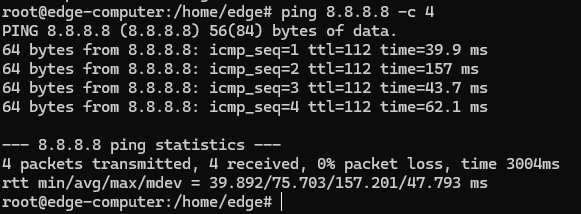
3.3 Confirm internet connectivity
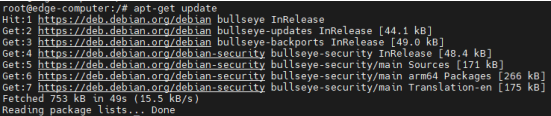
3.4 Update APT sources
3.5 Install pip

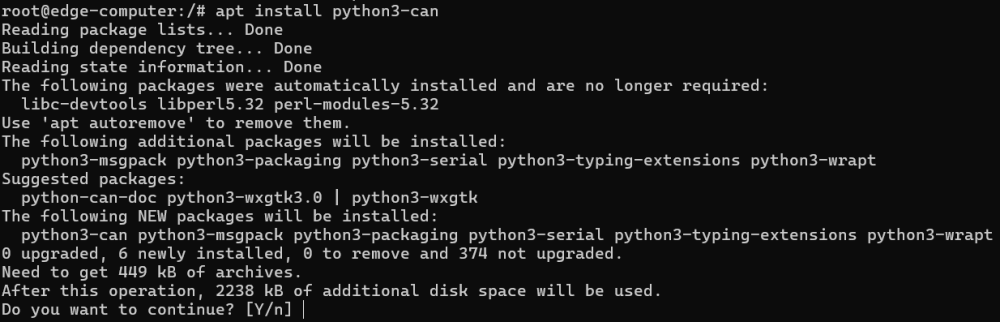
3.6 Install python-can
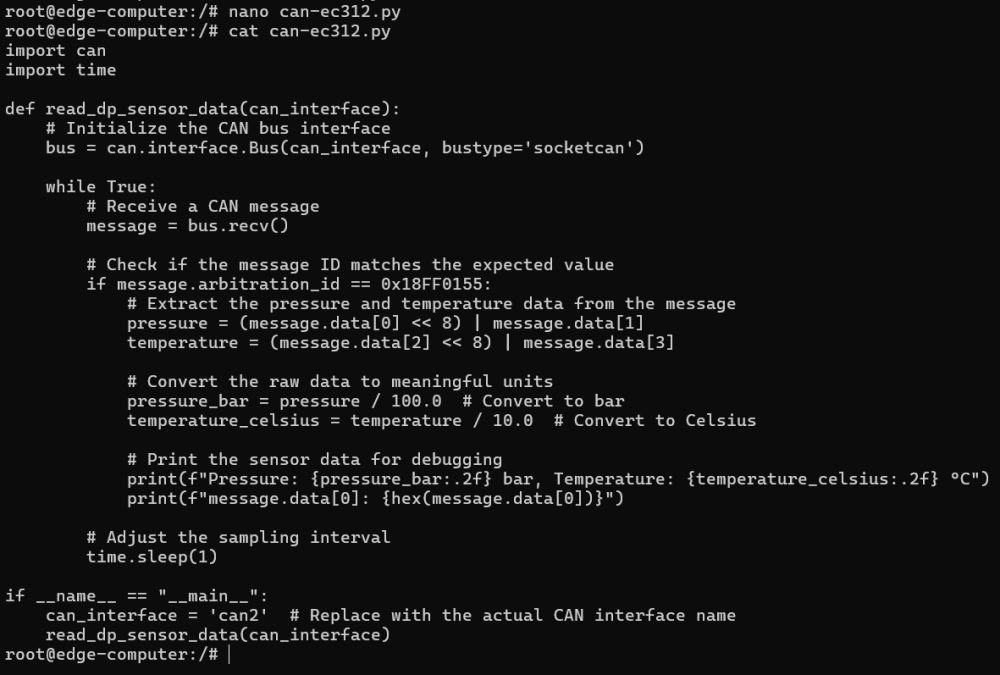
3.7 Write the first test script
Save the file as can-ec312.py:
3.8 Connect the CAN sensor to CAN2
Wire the DP sensor (or whichever CAN device) to the EC312 CAN2 port:
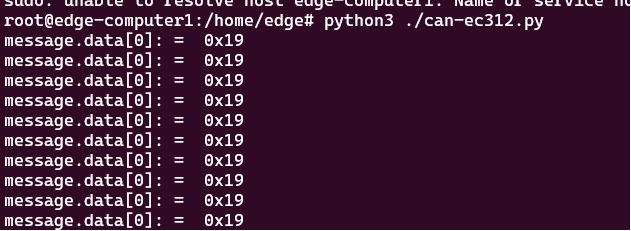
3.9 Run the Python script
You should see decoded pressure and temperature values printed to the console.
4. Part 2 — Create the Virtual Controller in Device Supervisor
Log in to the EC312 Web UI (https://<EC312_LAN_IP>) and open Device Supervisor (DSA). Reference:
https://help.inhand.com/portal/en/kb/articles/dsa
4.1 Create a virtual controller
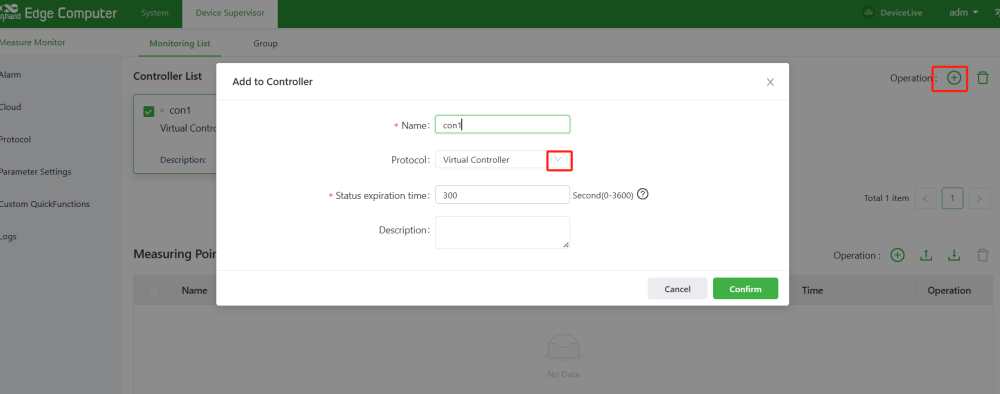
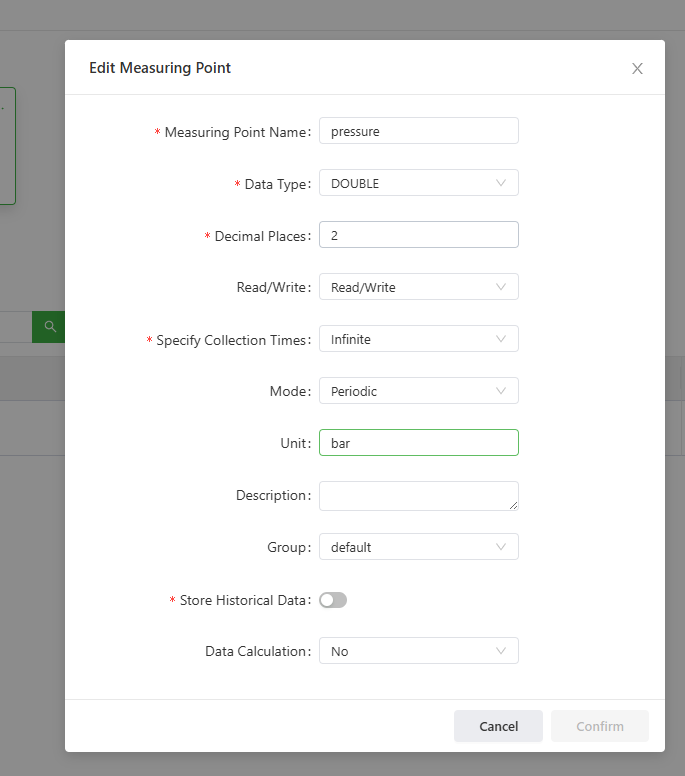
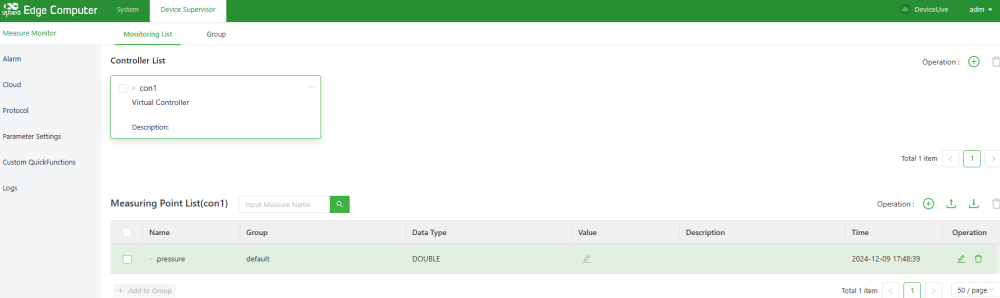
4.2 Add a measurement tag
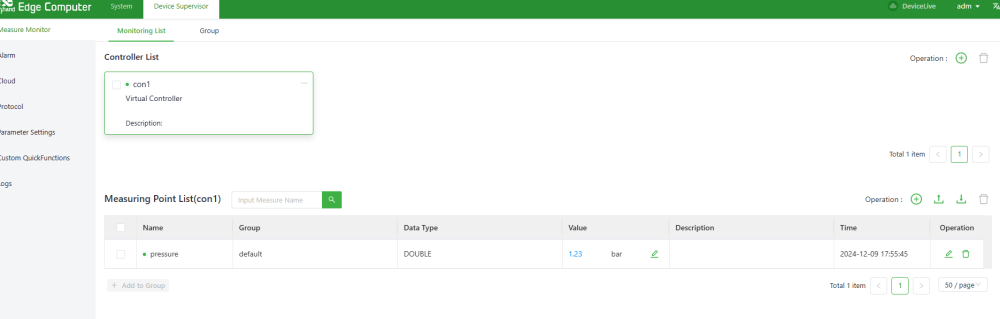
Add a tag named pressure (as an example). It will represent the value the Python app writes through MQTT.
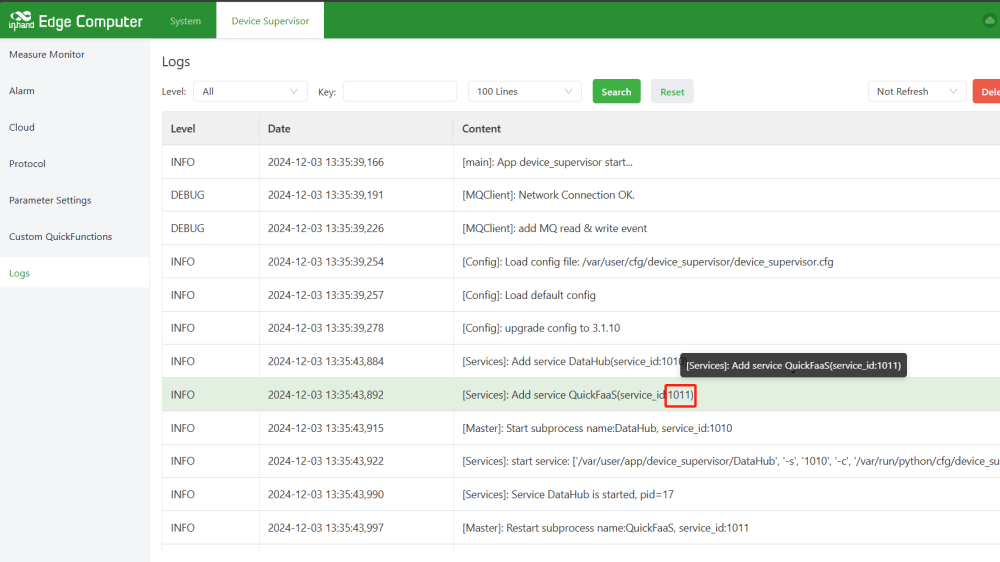
4.3 Note the Service ID of the controller
Each virtual controller has its own driver service ID. You will need it as {driverServiceId} in the MQTT topic.
5. Part 3 — Write CAN data into the Virtual Controller via Internal MQTT
Modify the Python script to connect to the internal MQTT broker of Device Supervisor and publish on the south-bound topic. Reference: https://help.inhand.com/portal/en/kb/articles/dsa#21_Connect_to_the_internal_MQTT_Broker
Internal MQTT broker (fixed):
| Item | Value |
|---|---|
| Host | 127.0.0.1 |
| Port | 9105 |
| Username | inhand |
| Password | inhand |
| South-bound write topic | ds2/eventbus/south/read/{driverServiceId} |

5.1 Updated Python script (with MQTT)
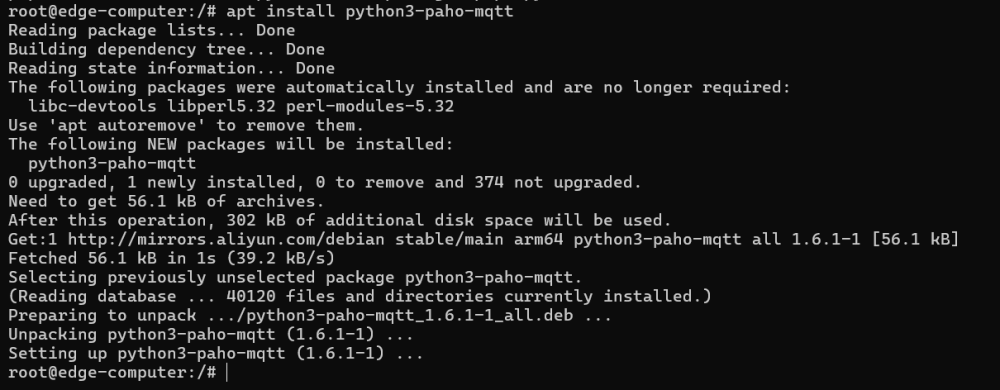
Install the MQTT library if needed:
pip3 install paho-mqtt

5.2 Verify in the Virtual Controller
Open Device Supervisor → Virtual Controller and confirm that the pressure tag updates with the value pushed from the internal MQTT bus.
6. Part 4 — Connect Device Supervisor to AWS IoT Core
AWS IoT configuration reference: https://help.inhand.com/portal/en/kb/articles/dsa#AWS_IoT_Instructions
6.1 Prepare AWS
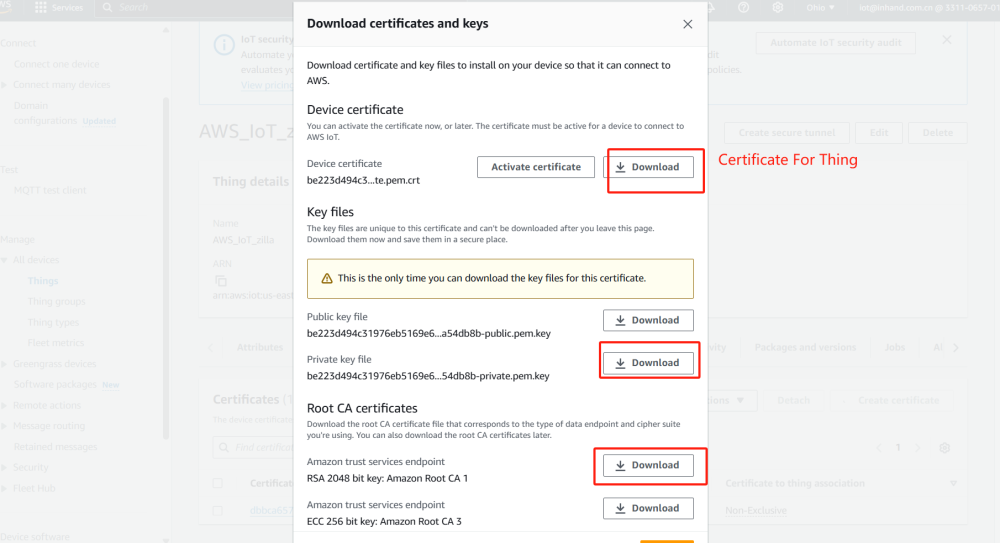
In the AWS IoT Core console:
- Create a Thing.
- Create or attach a Policy that allows
iot:Connect,iot:Publish,iot:Subscribe,iot:Receiveon the topics you will use. (Detailed steps in section 6.2 below.) - Generate / download the X.509 certificate, private key and the Amazon root CA.
- Take note of your AWS IoT endpoint (Settings → Device data endpoint), e.g.
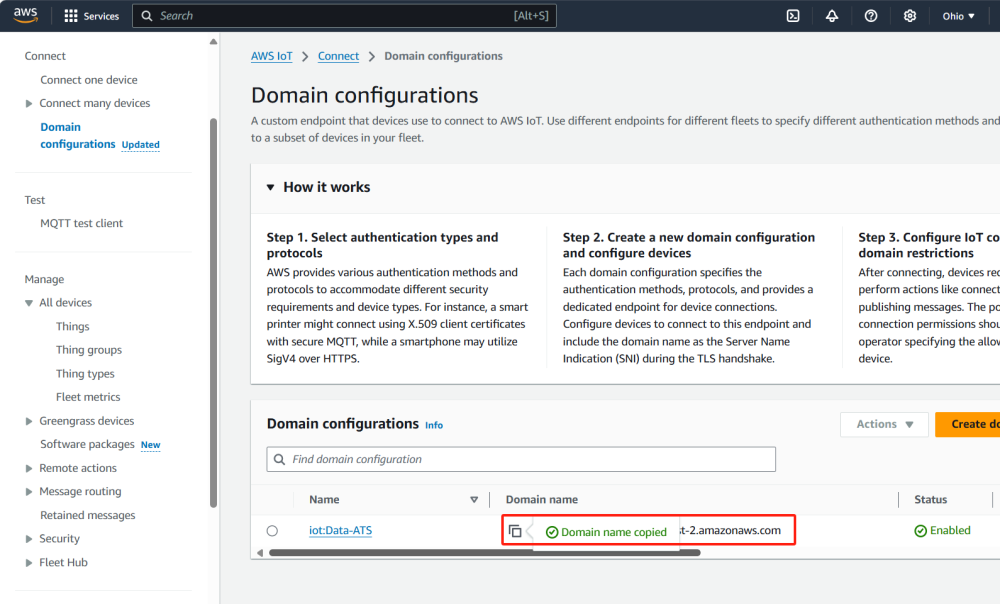
xxxxxxxxxxxxxx-ats.iot.<region>.amazonaws.com. (You can also copy the Domain name from AWS IoT Core → Connect → Domain configurations and use it as the endpoint for the device to connect to AWS IoT Core.)
6.2 Create the AWS IoT Policy
Console steps
- Log in to the AWS Management Console and open the IoT Core service.
- Left navigation → Manage → Security → Policies (in some regions: Security → Policies).
- Click Create policy (top-right).
- Under Policy properties:
- Policy name — e.g.
EC312_CAN_AWS_Policy. - Policy document — switch to the JSON editor (clearer than the default Builder mode).
- Paste the JSON below (replace topic names with your own), then click Create.
- After creation, attach the policy to the device certificate: Manage → All devices → Things → your Thing → Certificates → select the certificate → Actions → Attach policy → pick the policy you just created.
Important: the policy is attached to the certificate, not to the Thing. A single certificate can have multiple policies attached.
Policy JSON — recommended (least-privilege)
Replace the placeholders:
| Placeholder | Value |
|---|---|
<region> |
AWS region — e.g. us-east-1, ap-southeast-1. For AWS China prefix the ARN with aws-cn: (e.g. arn:aws-cn:iot:cn-northwest-1:…). |
<account-id> |
Your 12-digit AWS account ID (top-right of console under your user). |
ec312/pressure |
The publish topic — must match the Publish topic you set in DSA. |
ec312/cmd |
The subscribe topic for downlink commands. Remove the Subscribe/Receive statements if you don't need downlink. |
Important traps to avoid
- Publish / Receive use
topic/<name>(an exact topic resource). - Subscribe uses
topicfilter/<name>— even for an exact topic name. Usingtopic/here will returnnot authorized. - The
iot:Connectresource uses${iot:Connection.Thing.ThingName}, which forces the device to connect with a Client ID equal to its Thing name. Make sure the Client ID field in DSA matches the Thing name in AWS, otherwise the connection is refused. (Or relax it toclient/*— not recommended for production.) - TLS requires the device clock to be correct. EC312 must have a working NTP / cellular time sync, otherwise the certificate handshake fails.
Policy JSON — permissive (testing only)
If you just want to validate the link first, use the wildcard policy below, then tighten it once everything works:
Do not leave the permissive policy in production — switch to the least-privilege version above as soon as the pipeline is verified.
6.3 Configure AWS IoT in DSA
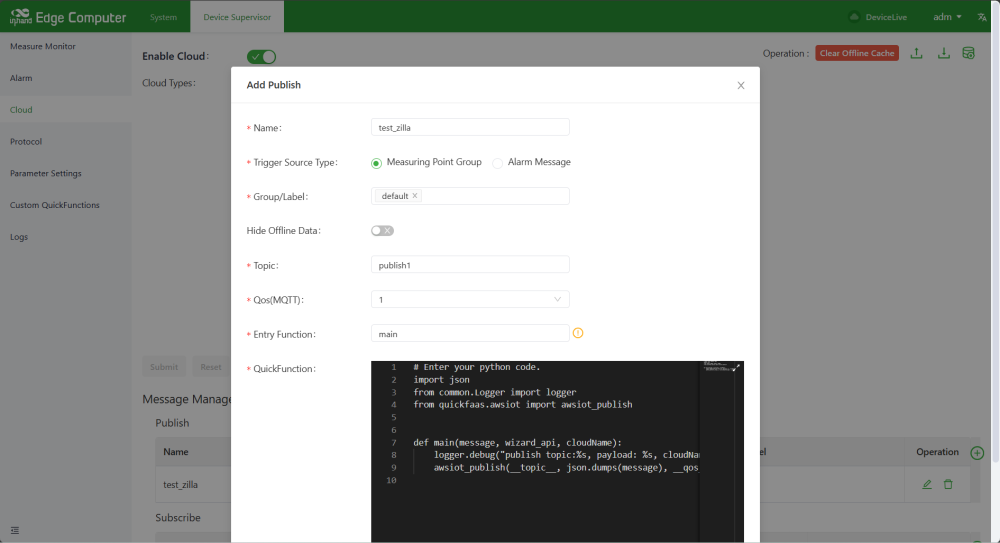
In EC312 Web UI → Device Supervisor → Cloud / Northbound → AWS IoT:
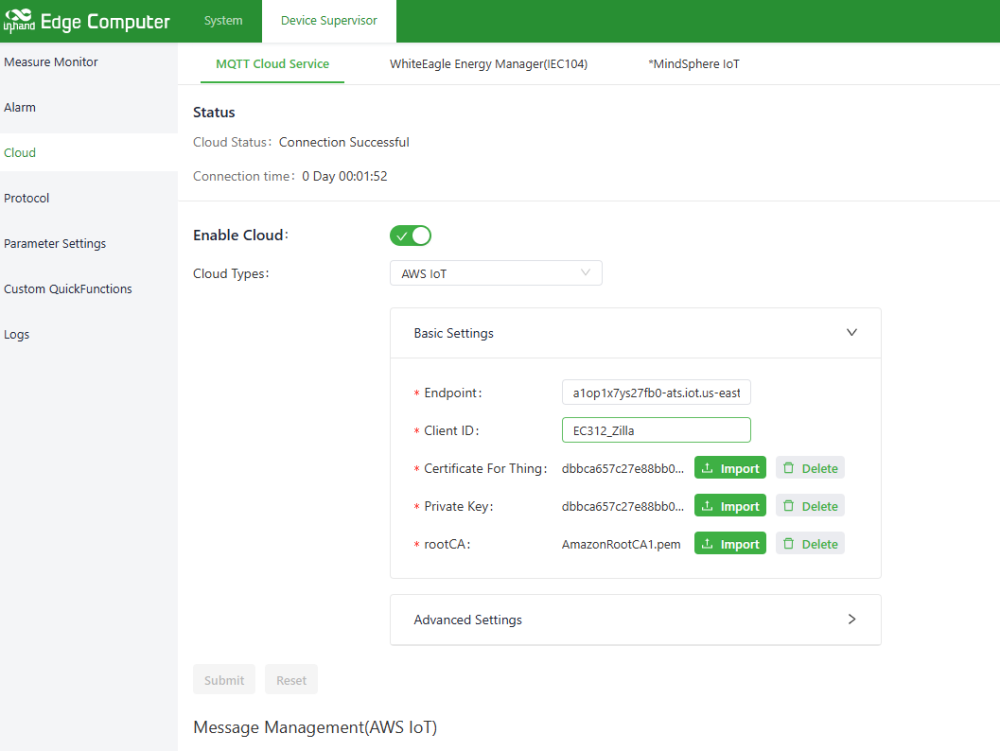
Fill in:
| Field | Value |
|---|---|
| Endpoint | the AWS IoT data endpoint copied above |
| Client ID / Thing name | as registered in AWS |
| Port | 8883 |
| CA certificate | Amazon root CA |
| Client certificate | the device certificate generated for this Thing |
| Client private key | the matching private key |
| Publish topic | e.g. ec312/pressure |
| Subscribe topic (optional) | e.g. ec312/cmd |
7. Part 5 — Publish to AWS and Verify
7.1 Publish from EC312
The configured publish topic on the EC312 side (this example):
7.2 Subscribe on AWS
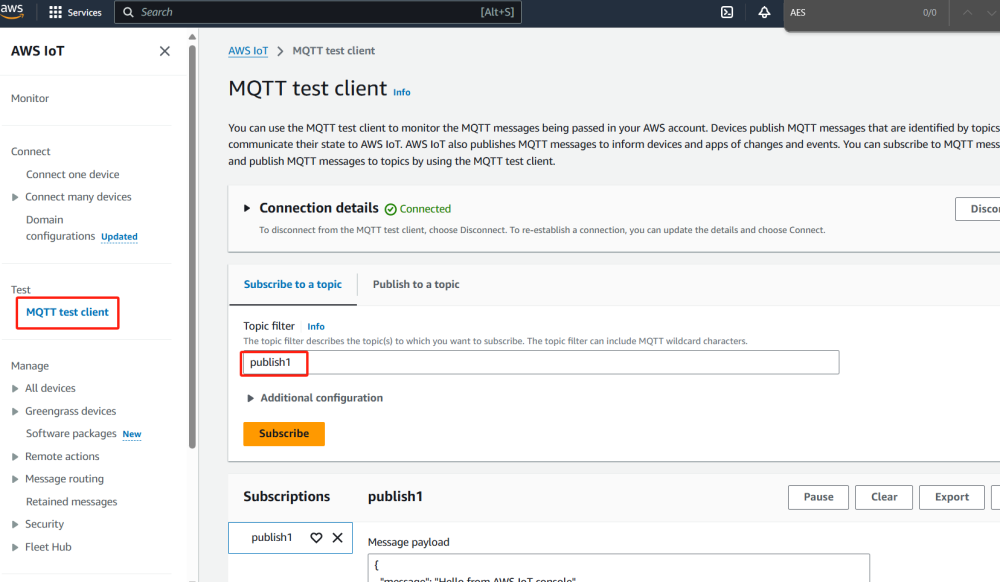
In AWS IoT Core → MQTT test client, subscribe to the same topic and watch the live messages from EC312:
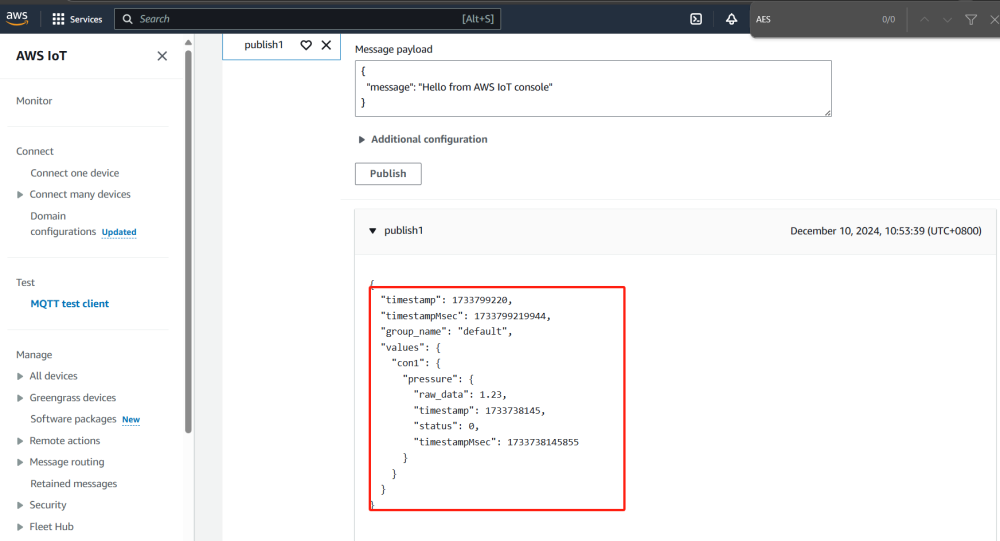
If the values match what the Python app prints in the SSH console, the end-to-end pipeline (CAN → Python → Internal MQTT → Virtual Controller → AWS IoT) is working.
8. Optional — Hardening & Operations
8.1 Change the default web password
System → Admin Access → User: change the password for adm. Apply and save.
8.2 Restrict remote management
System → Admin Access: choose which service (HTTPS / SSH), which port, and whether to allow remote (WAN) access.
8.3 Enable Device Manager (cloud O&M)
Services → Device Remote Management Platform:
- Enable.
- Service type: Device Manager.
- Server: choose China or International based on your project.
- Account: your InHand Device Manager account.
8.4 Backup the configuration
Services → Configuration Management → Router Config → Backup Config.
Restore via the Import Config button (reboot to take effect).
8.5 Run the Python app on boot
Make the script a systemd service so it survives reboots:
9. Troubleshooting
| Symptom | Check |
|---|---|
| Cannot open Web UI | Same subnet? IP conflict? Try factory reset. |
| Cellular cannot dial up | SIM seated? APN correct? Signal value 21–30? |
| Signal OK but cannot reach AWS | LAN IP / gateway / DNS correct on EC312? SIM whitelist allows the AWS endpoint? |
can.interface.Bus raises OSError |
can2 is up? ip link show can2 — ifconfig can2 up if needed. |
| No frames received | Wrong arbitration ID? Termination resistor missing? Baud rate mismatch? |
| MQTT publish fails to internal broker | Username inhand / password inhand? Port 9105? Service ID matches the controller? |
| AWS IoT connection refused | Certificate / policy / endpoint correct? Time on EC312 synced (TLS needs valid clock)? |
10. Safety Notes
- Ground the device properly on industrial / vehicle sites.
- Do not hot-plug serial / CAN cables while powered.
- Back up the configuration after every change.
- Change default passwords periodically.
- Only authorized personnel should operate the gateway.